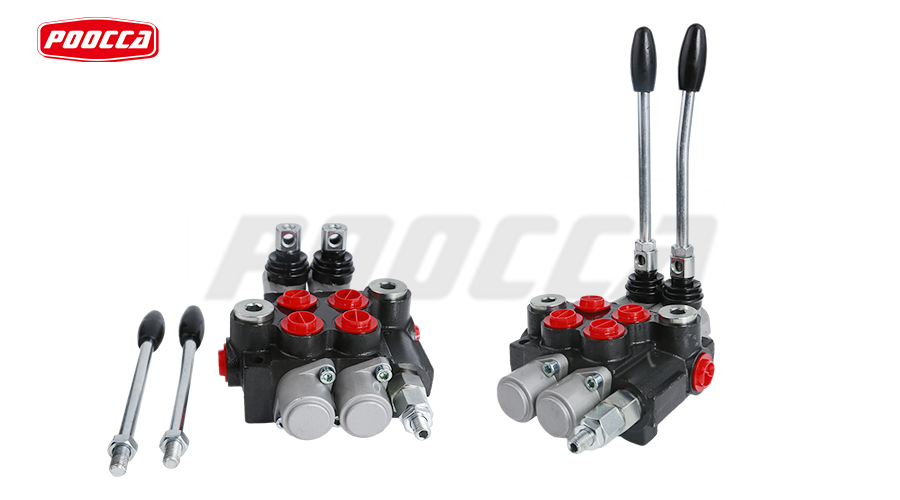
Hydraulic valve repair is a highly technical job that requires an in-depth understanding of the principles, structure and performance of the hydraulic system. This article will introduce in detail the disassembly, inspection and assembly of hydraulic valves.
1. Disassembly of hydraulic valve
Preparation work: Before disassembling the hydraulic valve, you must first understand the working principle of the hydraulic system, the type and structural characteristics of the hydraulic valve, in order to choose the appropriate disassembly tools and methods. At the same time, make sure that the hydraulic system has stopped working and cut off the power supply to prevent accidents.
Disassembly sequence: The disassembly sequence of the hydraulic valve should follow the principle of from outside to inside and from top to bottom. Disassemble the external connecting parts first, and then disassemble the internal parts. This avoids damage or leakage of parts caused by improper disassembly order.
Disassembly method: The main disassembly methods of hydraulic valve are as follows:
(1) Threaded connection: For hydraulic valves with threaded connections, a wrench or socket wrench can be used to disassemble them. When disassembling, pay attention to using even force to avoid being too tight or too loose.
(2) Flange connection: For flange-connected hydraulic valves, a wrench or bolt tensioner can be used to disassemble it. When disassembling, pay attention to tightening the bolts diagonally to prevent leakage.
(3) Welding connection: For hydraulic valves with welding connections, welding tools need to be used for disassembly. When disassembling, pay attention to prevent the weld from cracking and causing leakage.
Note: When disassembling the hydraulic valve, pay attention to the following points:
(1) Keep clean: Keep the working environment and parts clean during the disassembly process to prevent impurities from entering the hydraulic system.
(2) Prevent damage: Avoid using inappropriate tools and methods during disassembly to prevent damage to parts.
(3) Record information: During the disassembly process, the type, model, installation location and other information of the hydraulic valve should be recorded for subsequent inspection and assembly.

2. Inspection of hydraulic valves
Appearance inspection: Check the appearance of the hydraulic valve for damage, deformation, rust, etc. If there is any damage, replace it in time.
Seal inspection: Check whether the seals of the hydraulic valve are worn, aged, damaged, etc. If damaged, they should be replaced in time.
Spring inspection: Check whether the spring of the hydraulic valve is deformed, broken, elastically failed, etc. If it is damaged, it should be replaced in time.
Piston inspection: Check the piston of the hydraulic valve for wear, scratches, deformation, etc. If it is damaged, replace it in time.
Valve core inspection: Check the valve core of the hydraulic valve for wear, scratches, deformation, etc. If it is damaged, replace it in time.
Flow check: By measuring the flow of the hydraulic valve, determine whether its working performance is normal. If the flow rate is abnormal, the internal parts of the hydraulic valve may be damaged or blocked, and further inspection and repair are required.
Pressure check: By measuring the pressure of the hydraulic valve, determine whether its working performance is normal. If the pressure is abnormal, the internal parts of the hydraulic valve may be damaged or blocked, and further inspection and repair are required.
Leak inspection: By observing the leakage of the hydraulic valve, determine whether its sealing performance is normal. If the leak is severe, the seal may be damaged or improperly installed, requiring further inspection and repair.

3. Assembly of hydraulic valve
Cleaning parts: Clean the disassembled hydraulic valve parts to remove impurities and oil stains to ensure the cleanliness of the parts.
Replace damaged parts: According to the inspection results, replace the damaged hydraulic valve parts to ensure that the performance and size of the new parts are consistent with the original parts.
Assembly sequence: The assembly sequence of the hydraulic valve should follow the principle of from inside to outside and from bottom to top. Assemble the internal parts first, and then assemble the external connectors. This avoids damage or leakage of parts caused by improper assembly sequence.
Assembly method: The main assembly methods of hydraulic valves are as follows:
(1) Threaded connection: For hydraulic valves with threaded connections, a wrench or socket wrench can be used for assembly. When assembling, pay attention to using even force to avoid being too tight or too loose.
(2) Flange connection: For flange-connected hydraulic valves, a wrench or bolt tensioner can be used for assembly. When assembling, pay attention to tightening the bolts diagonally to prevent leakage.
(3) Welding connection: For hydraulic valves with welding connections, welding tools need to be used for assembly. When assembling, pay attention to prevent the welds from cracking and causing leakage.
Notes: During the assembly process of hydraulic valves, pay attention to the following points:
(1) Keep clean: Keep the working environment and parts clean during the assembly process to prevent impurities from entering the hydraulic system.
(2) Prevent damage: Avoid using inappropriate tools and methods during assembly to prevent damage to parts.
(3) Check the seal: After assembly, check the sealing performance of the hydraulic valve to ensure there is no leakage.
Hydraulic valve repair is a highly technical job that requires an in-depth understanding of the principles, structure and performance of the hydraulic system. By mastering the disassembly, inspection and assembly methods of hydraulic valves, maintenance efficiency and quality can be effectively improved and the normal operation of the hydraulic system can be ensured.
Post time: Nov-08-2023


